
Configuring multiple languages
Canvas is designed to support multiple languages and integrates the language selection directly with Bubble. In addition, we provide an easy integration with LocalizeJS for full language support throughout your app.
Enabling multiple languages
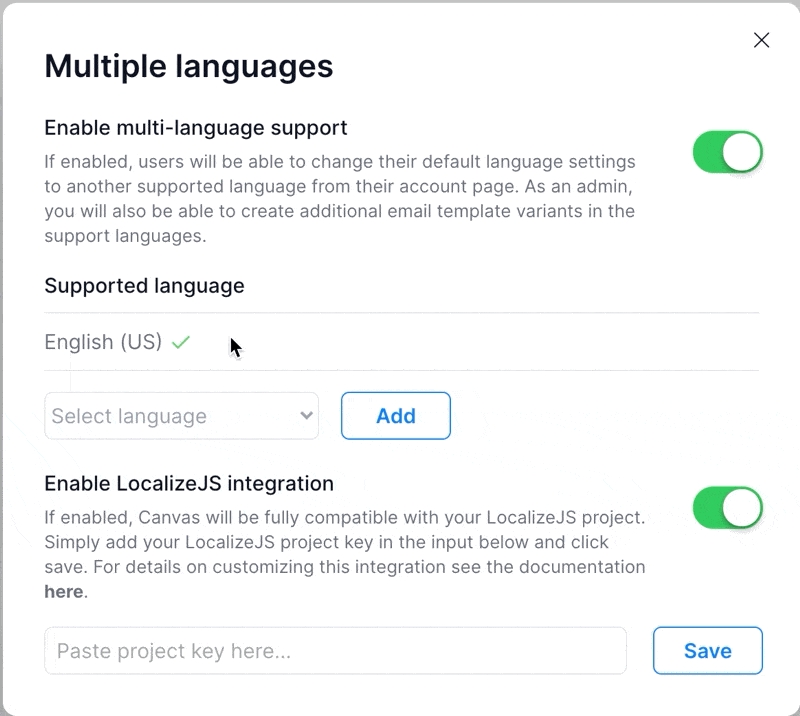
By default your Canvas template will have multi-language functionality turned off. If you would like to use additional languages, in the admin portal navigate to Settings > Multiple Languages and toggle the 'Enable multi-language support' option.
With multi-language support enabled you will see additional functionality available to you.
Supported Languages
This is a list of languages that you can allow your app to support will contain English (US) as the default for your platform.
You can add additional supported languages by selecting from the dropdown and clicking the add button. When you have more than one supported language, from the action menu you can choose to set a new language as the default.Add a captionThe default language cannot not be removed from the system and is used throughout Canvas as the fallback language if the user has not set a default language for themselves.
LocalizeJS Integration
If you haven't already, create an account and a new project on https://localizejs.com.
Setting up the details of your project within Localize is outside the scope of this tutorial but LocalizeJS has created detailed walkthrough documentation here.
Enable Localize
In the admin portal, navigate to Settings > Multiple Languages. Multi-language support should already be enabled from the previous step.
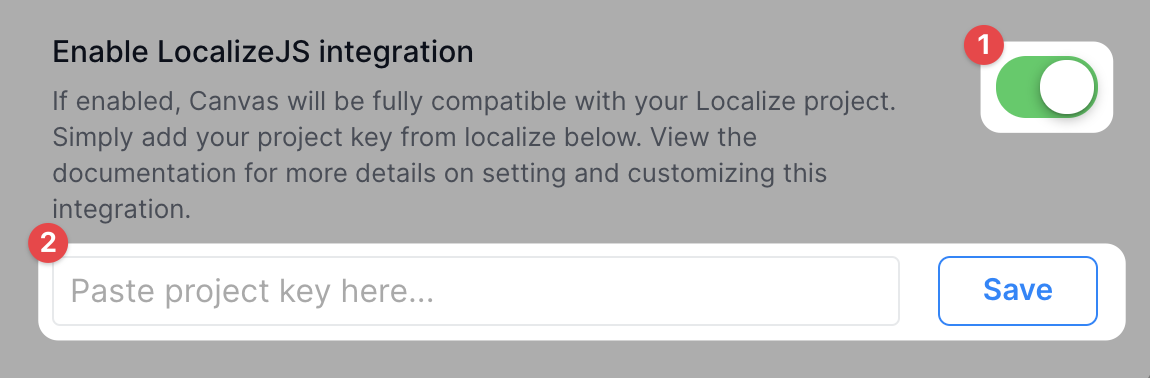
Find the 'Enable LocalizeJS integration' option and toggle it to on.
Once you have enabled your integration, copy the Project Key from your LocalizeJS dashboard. Paste this into the project key input and click the save button.
Customize your Localize integration
The default integration in Canvas handles generating the code including your dynamic project key and the default language set for the app. Below is the code that we use to initialize this integration.
If you would like more granular control over your integration we recommend you simply toggle off the built in Canvas functionality and add your own custom localizeJS script directly to the Script/meta tags in header field found in the Bubble editor under Settings > SEO/metatags.
Last updated
Was this helpful?